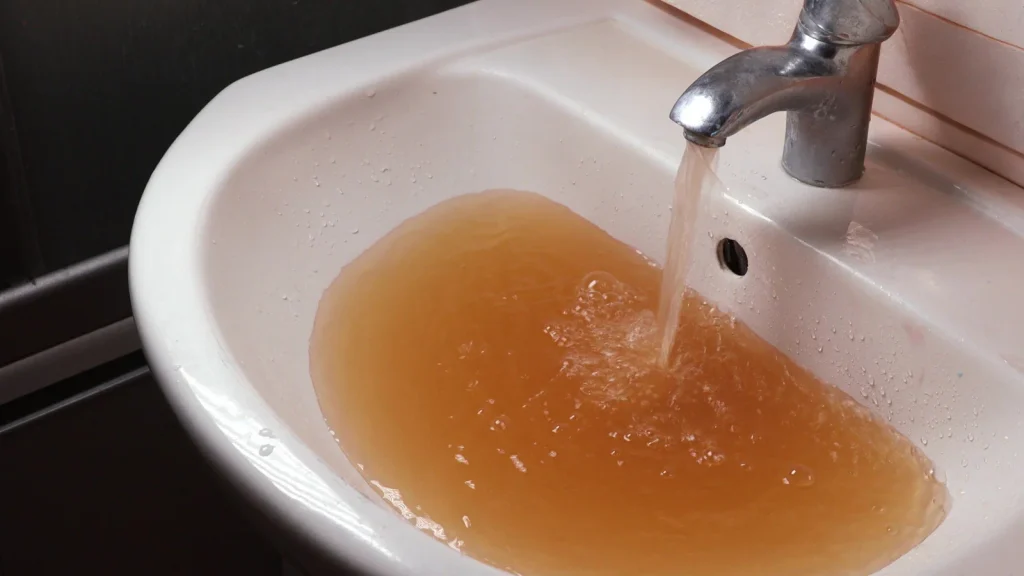
When severe weather strikes and floodwaters submerge your yard, the safety of your private water supply is compromised almost instantly. Unlike municipal tap connections subject to automated oversight and secondary disinfection barriers, private drinking water systems depend entirely on homeowner stewardship. Surface flood runoff carries raw sewage, agricultural runoff, industrial waste, heavy silt, and microbial pathogens directly toward wellheads. Once floodwaters overtop a well casing or seep down through compromised soil strata, toxic biological contaminants infiltrate your pressure tank, water lines, filtration equipment, and plumbing fixtures.
Following a flood, you must treat your water supply as contaminated until mechanical repairs, chemical sanitation, and certified laboratory analysis demonstrate that it is safe to drink. According to EPA recommendations for private well owners, consuming unverified flood-affected well water carries severe risks of gastrointestinal disease caused by bacteria, viruses, and parasites. The standard recovery procedure involves a rigorous process known as shock chlorination—introducing a concentrated chlorine solution into the well, circulating it across your plumbing network, letting it sit to eliminate biological threats, and thoroughly purging the system before testing.
Immediate Post-Flood Safety Precautions
Before touching your well equipment or opening any taps, take decisive safety precautions to avoid electric shock, mechanical failure, or personal injury. Electrical hazards are the most acute immediate danger around flooded well components.
- Turn off the electrical supply: Cut power to your well pump at the main circuit breaker before approaching the wellhead, pressure switch, or pump control box. Never step into standing water near electrical panels, wiring conduits, or submerged equipment.
- Do not drink, cook, or brush teeth with well water: Secure an alternative supply of bottled water for all potable uses. Alternatively, bring water to a rolling boil for at least one full minute before use if no bottled water is accessible, though boiling does not neutralize chemical or fuel contaminants.
- Keep children and pets away: Saturated ground around flooded well casings can occasionally collapse or form sinkholes if subterranean soil eroded during high-velocity runoff.
- Protect sensitive filtration equipment: Bypass or disconnect water softeners, reverse osmosis systems, iron filters, and whole-house filtration cartridges. Chlorine solutions used during shock treatment will ruin ion-exchange resin beads and destroy fragile reverse osmosis membranes.
Assessing Damage and Preparing the Well for Disinfection
Shock chlorination cannot succeed if the physical integrity of the well system remains compromised. Pouring bleach into a casing filled with silt or powered by a waterlogged pump will only create recurring contamination or mechanical failure.
Step 1: Inspect the Wellhead and Mechanical Parts
Once floodwaters recede from the wellhead, examine the sanitary seal, casing, and electrical conduit. Check whether the sanitary cap came loose, cracked, or dislodged during the deluge. If your wellhead was submerged beneath murky water, silt, mud, and decaying debris may have settled at the bottom of the well column. A licensed well contractor should perform an inspection if you suspect structural damage to the casing or if the submersible pump ran while packed with grit.
Step 2: Clear Silt and Mud Turbidity
Shock chlorination requires relatively clear water to work effectively. Organic matter and suspended sediment consume chlorine before the chemical can neutralize bacteria and viruses. Attach an outdoor garden hose directly to the pressure tank drain valve or an exterior frost-proof sillcock. Route the hose away from your septic drain field to a roadside ditch or an open drainage area, and run the pump until the discharge runs visibly clear. Never discharge this initial muddy flush into a home septic system, as heavy hydraulic loads and silt can clog drain field soils.
Understanding Shock Chlorination Chemistry
Disinfecting an entire well and household plumbing system requires a targeted chemical concentration rather than arbitrary guess work. The industry benchmark requires achieving an active chlorine concentration of 100 to 200 parts per million (ppm) throughout the entire volume of water stored in the well casing and the household distribution network.
To establish an effective sanitation plan, homeowners should consult resources such as the Water Quality Journal to understand baseline recovery steps and how environmental disturbances affect groundwater aquifers. Achieving the correct concentration requires calculating the volume of standing water inside the borehole. Standing water depth equals total well depth minus the static water level (the depth from the surface to the resting water table). A standard 6-inch diameter drilled well casing holds approximately 1.5 gallons of water per vertical foot, whereas an older 4-inch casing holds roughly 0.65 gallons per foot.
Always use unscented, plain household liquid chlorine bleach (5% to 8.25% sodium hypochlorite) or certified dry calcium hypochlorite pellets labeled for potable water systems. Never use scented laundry bleaches, splashless formulations, or swimming pool shock formulas containing cyanuric acid, algaecides, or industrial fragrances that make water toxic for human consumption.
Step-by-Step Well Shock Chlorination Protocol
Follow this systematic procedure to treat your well and plumbing infrastructure thoroughly after the casing is verified clear of debris and the pump operates properly.
1. Prepare the Chlorine Solution
Do not pour raw bleach directly down the well casing in an undiluted stream, as dense bleach sinks to the bottom without dispersing across the upper water column. Instead, dilute between one-half and one gallon of liquid household bleach into five to ten gallons of clean water in a plastic bucket. For deep wells or severe inundation, consult local agricultural extension tables to fine-tune your specific chlorine volume.
2. Introduce the Sanitizing Agent
Remove the well cap or unscrew the inspection plug on the sanitary seal. Insert a clean funnel into the access port and pour the diluted chlorine solution slowly down the inside walls of the casing, ensuring the mixture coats the entire interior surface. If you are using dry calcium hypochlorite tablets to ensure deep treatment at the well base, drop them in slowly to avoid bridging inside the casing.
3. Recirculate the Chlorinated Water
Connect a clean garden hose to the nearest outdoor sillcock or tank drain and direct the nozzle straight into the well casing access port. Turn on the spigot and allow water to run back down the borehole for 15 to 30 minutes. This circulation pattern washes down the upper casing walls and ensures the chlorine mixes thoroughly across the water column. You will recognize proper circulation as soon as a strong chlorine odor emerges from the hose discharge.
4. Disinfect Household Distribution Lines
Once chlorine circulation is confirmed at the wellhead, turn off the garden hose spigot, seal the wellhead cap securely, and move inside the home. Open every indoor faucet, showerhead, laundry valve, and outside hose bib one by one, starting with fixtures closest to the pressure tank. Let each run until a distinct bleach odor is noticeable, then shut it off immediately. Be sure to flush every toilet until chlorinated water refills the tank. Do not forget hot water lines; flushing ensures your water heater interior is sanitized alongside cold lines.
5. Maintain Contact Time
Leave the chlorinated water undisturbed inside the well, pressure tank, and residential pipes for a minimum of 12 hours, with 24 hours being optimal. During this retention period, the concentrated hypochlorite ions penetrate biofilm layers, neutralize vegetative bacteria, deactivate viral agents, and eliminate lingering organic residues. Inform all household occupants not to use any water during this window.
Flushing and Discharging the Chemical Solution
After the full 24-hour retention period elapses, the highly concentrated chlorine solution must be completely flushed out of the system before the water is safe for everyday utility chores.
- Flush via an outdoor hose: Connect your garden hose to an outdoor tap and discharge water onto a gravel driveway or open roadside ditch. Avoid draining chlorinated water into lawns, flowerbeds, natural waterways, or storm drains, as concentrated hypochlorite kills vegetation and devastates aquatic life.
- Prevent septic system damage: Never purge high-concentration shock water into household drains connected to a septic tank. Excess chlorine destroys the beneficial bacterial colonies responsible for digesting septic solids, which can lead to premature drain field failure.
- Run the well in intervals: Flush for one to two hours, shut the spigot off to let the well recover if your aquifer exhibits a low recharge rate, and repeat until the chlorine odor disappears completely.
- Flush indoor lines: Once the water at the outdoor sillcock smells completely fresh, open all indoor taps and run them until lingering chemical residues are evacuated.
Post-Disinfection Water Testing and Verification
Completing a shock chlorination sequence does not mean your water is immediately potable. Chlorine masks underlying water characteristics, and harmful microorganisms can reappear once fresh aquifer water replenishes the borehole. Reviewing a detailed water quality fundamentals guide helps well owners grasp the interplay between chemical disinfection, aquifer recharge dynamics, and microbial regrowth.
Wait 7 to 14 days following disinfection before drawing a sample for certified microbiological analysis. Testing immediately after flushing frequently yields false-negative results due to trace chlorine residual suppressing bacterial activity in sample bottles. During this intermediate waiting window, continue using bottled or boiled water for cooking, drinking, and oral hygiene.
Submit your water samples to an environmental laboratory certified by your state or county health department. A standard post-flood panel must screen for total coliform bacteria and Escherichia coli (E. coli). Total coliforms serve as broad indicator organisms that suggest environmental surface contamination, while E. coli indicates direct fecal pollution. The health criteria defined under the federal National Primary Drinking Water Regulations require zero detectable coliform colonies per 100 milliliters of drinking water.
Flooding can also dislodge accumulated scale or mobilize localized environmental hazards. In urban or semi-rural properties with historical piping infrastructure, regional residents often arrange accredited lead testing services for the Bronx to ensure flood movements have not released heavy metals from aged private connections. Familiarizing yourself with an overview of common contaminants will help you decide whether your post-flood screening should expand beyond bacteria to include nitrates, synthetic organic compounds, gasoline additives, or heavy metals.
Addressing Persistent Contamination and Structural Failures
If your laboratory report returns positive for coliform bacteria after a thorough shock chlorination treatment, do not repeat the exact same procedure blindly. Persistent contamination usually indicates continuous infiltration or mechanical damage requiring structural intervention.
Common Causes of Repeated Disinfection Failures
- Compromised sanitary seals: A cracked rubber gasket or corroded cap allows surface water, insects, and organic dust to enter the casing continuously.
- Subsurface casing cracks: Ground settling during floods can shear PVC casings or split corroded steel joints several feet underground, allowing contaminated shallow groundwater to pour into the borehole.
- Biofilm shielding: Severe slime and iron bacterial biofilms within the well screen can encase microbial colonies, shielding them from brief chemical exposure.
- Widespread aquifer contamination: If floodwaters submerged vast regional areas, entire shallow aquifers can remain contaminated for weeks or months until natural hydrological filtration cleanses the groundwater layer.
Additionally, private infrastructure running through older homes may require specialized structural evaluations. Reviewing guidance on water quality in older buildings can clarify how outdated galvanized plumbing, degraded solder, and dormant pipe sections harbor stubborn bacterial reservoirs even after aggressive wellhead shock chlorination.
Long-Term Preventive Measures for Flood-Prone Wells
If your well flooded once, future extreme weather events pose an ongoing risk. Investing in flood-mitigation upgrades protects your health, safeguards equipment investments, and minimizes future maintenance emergencies.
Consider extending your well casing vertically. Modern sanitary codes require well casings to terminate at least 12 inches above the historical 100-year flood elevation and a minimum of 18 to 24 inches above finished ground grade. Replace standard loose-fitting well caps with a certified watertight sanitary well cap fitted with a screened, down-turned air vent. Ensure the ground surrounding the wellhead slopes gently downward in all directions for at least 10 to 15 feet to route surface water away from the borehole.
Finally, for private wells located in low-lying riparian corridors or persistent flood zones, installing continuous barrier systems provides essential secondary insurance. Ultraviolet (UV) microbiological disinfection systems, sub-micron absolute filtration, and continuous chlorination injection setups ensure that transient microbial breaches do not turn into severe health crises.