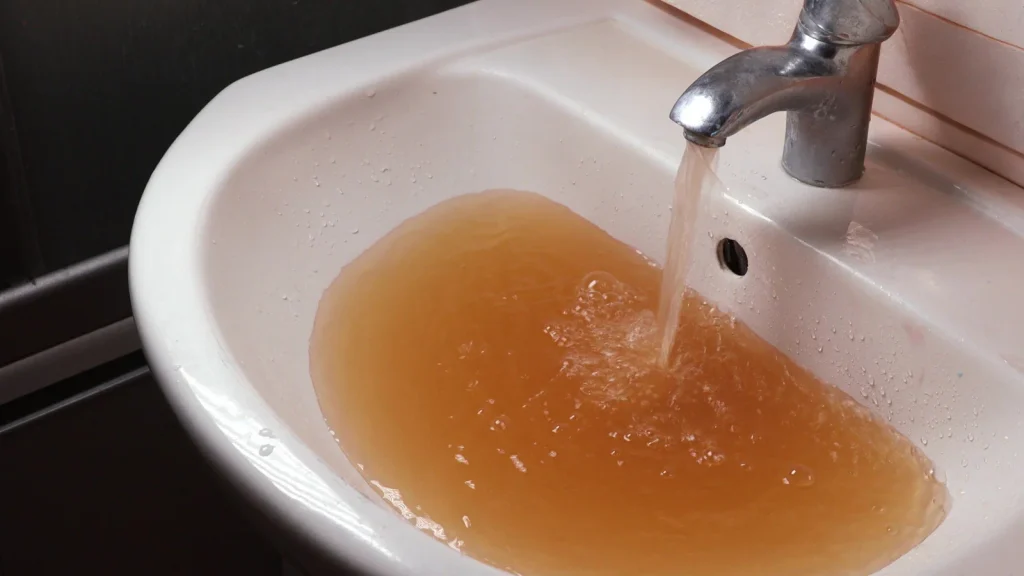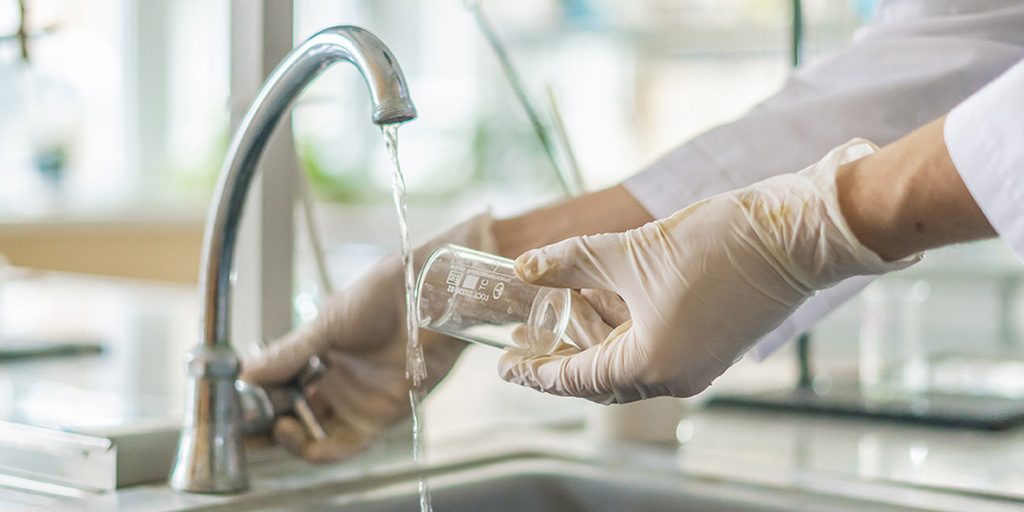
Laboratory testing represents the definitive benchmark for evaluating drinking water purity, whether diagnosing chronic plumbing corrosion, qualifying a private well, or validating commercial filtration systems. Yet even the most advanced mass spectrometer or microbiological incubator cannot compensate for compromised sampling technique. A laboratory assay only reflects the precise characteristics of the liquid introduced into the collection vessel. When ambient particulates, skin oils, improper purge cycles, or contaminated container rims interfere with the collection process, the resulting data is functionally useless—wasting time, inflating analytical costs, and creating unwarranted panic or dangerous false confidence.
Executing an accurate water sampling protocol requires strict adherence to standardized chain-of-custody procedures, disciplined physical hygiene, and an understanding of how distinct analytical parameters dictate sample capture. Analytical facilities certified under state environmental boards and national accreditation programs mandate rigid physical handling parameters. By applying the exact procedures utilized by field hydrologists and environmental technicians, property owners and facility managers can safeguard sample integrity from the tap directly to the testing bench.
Understanding Why Collection Technique Dictates Lab Validity
Water quality testing operates on microscopic thresholds. Chemical analytes like lead, arsenic, and per- and polyfluoroalkyl substances (PFAS) are quantified in parts per billion (ppb) or parts per trillion (ppt), while microbiological assays identify single viable bacterial cells in a hundred-milliliter volume. At these minuscule concentrations, accidental contamination is effortless. A stray fingerprint on the inner thread of a vial lid can register as false coliform proliferation. Similarly, allowing an aerator screen to remain attached to a spigot introduces dislodged biofilm and sediment, entirely skewing a heavy metals assay.
Federal regulatory frameworks established under the Safe Drinking Water Act statutory provisions require public utilities to execute systematic collection methods precisely because ambient variables distort baseline measurements. When private individuals or commercial operators submit independent samples, laboratory instrumentation processes the specimen without knowing whether detected analytes derived from the plumbing system or the sampler’s sleeve. Understanding foundational physical metrics, which are detailed across our water quality fundamentals guide, clarifies why specific analytes necessitate customized sampling regimes rather than a generic, one-size-fits-all dip test.
Step 1: Selecting the Appropriate Laboratory and Specimen Bottles
Never collect a laboratory water sample in standard household containers such as repurposed water bottles, mason jars, or food-grade storage vessels. Commercial plastics leach plasticizers and phthalates, while glass containers can adsorb heavy metals onto their silica walls or introduce trace detergent residues. Certified facilities dispense dedicated sampling kits configured for specific analyte profiles:
- Microbiological Assays (Total Coliform and E. coli): Shipped in sterile, sealed polystyrene or polypropylene bottles containing a visible white tablet or powdery film. This additive is sodium thiosulfate, a chemical neutralizer that instantly halts any residual chlorine or chloramine disinfectant upon collection, preventing it from killing bacteria in transit. Never rinse this preservative out.
- Metals and Inorganics (Lead, Copper, Iron, Nitrate, Hardness): Packaged in high-density polyethylene (HDPE) containers. Metals bottles are frequently pre-acidified with trace nitric acid (HNO3) to drop sample pH below 2.0, keeping metal ions suspended in solution rather than plating against container walls.
- Volatile Organic Compounds (VOCs): Provided in specialized 40-milliliter amber glass borosilicate vials with PTFE-lined septum caps. These require zero-headspace collection to prevent volatile hydrocarbons from evaporating into air pockets inside the vial.
- Per- and Polyfluoroalkyl Substances (PFAS): Bottled in specialized fluoropolymer-free plastics, accompanied by stringent field-blank instructions to prevent cross-contamination from everyday consumer apparel, cosmetics, or packaging materials.
Confirm that the testing laboratory maintains active state or National Environmental Laboratory Accreditation Program (NELAP) accreditation. If you are uncertain which analytical panels correspond to your plumbing layout or local geological conditions, you can contact us to assess target parameters before commissioning testing materials.
Step 2: Preparing the Sampling Point and Workspace
The fixture selected for sample extraction dramatically influences the meaning of the analytical data. For evaluating potable domestic water quality, choose a cold-water faucet that receives frequent use, typically an indoor kitchen sink. Avoid outdoor hose bibbs, utility sinks, swivel-neck faucets with internal mixing chambers, or fixtures connected directly to point-of-use softeners and carbon cartridges unless you are deliberately testing filter efficiency.
Sanitizing and Stripping the Fixture
Modern faucets harbor microbial ecosystems and physical debris within their peripheral hardware. Before touching your laboratory sample bottles, prepare the fixture using this sequence:
- Remove Peripheral Attachments: Unscrew the tap aerator, internal flow restrictors, decorative filtration attachments, or pull-out spray hoses. These housings trap sediment, rubber gasket fragments, and bacterial biofilms that do not represent bulk water quality.
- Physical Cleansing: Inspect the interior mouth of the spout for mineral scaling, organic grime, or debris. Clean the spout rim with an alcohol wipe or dilute bleach solution.
- Disinfection for Bacterial Testing: When microbiological screening is ordered, spray the exterior and interior lip of the bare spout with 70% isopropyl alcohol or a 10% sodium hypochlorite solution, letting it sit for two minutes. Alternatively, metal spouts without internal plastic or rubber components may be sanitized with an open flame from a butane lighter, though chemical sanitization is safer for modern fixtures.
- Operator Hygiene: Wash hands thoroughly with fragrance-free soap and warm water, donning clean nitrile, powder-free gloves prior to unsealing sterile sampling kits.
Step 3: Navigating First-Draw vs. Fully Purged Protocols
The single greatest operational divergence in water sampling rests between stagnant “first-draw” sampling and dynamic “purged” wellhead or distribution sampling. Applying the wrong protocol produces analytical data that misrepresents actual exposure risks.
First-Draw Protocol (Heavy Metals and Plumbing Leaching)
Heavy metals such as lead, copper, and zinc enter potable water through internal contact with pipes, soldered brass fittings, and vintage fixture components. Consequently, measuring true human exposure demands capturing the water that has absorbed these elements while resting motionless inside the building’s infrastructure.
Enforce an uninterrupted stagnation window of at least six to eight hours throughout the entire facility. Do not flush toilets, run laundry machines, or drink from any fixture during this period. Position the unrinsed laboratory bottle directly beneath the spout before touching the handle. Turn the cold water tap on at a steady, moderate rate—preventing violent splashing—and fill the container to the brim on the initial surge. Property managers investigating suspected riser deterioration or older residential plumbing frequently coordinate professional lead water inspection and testing in Manhattan to ensure collection parameters align strictly with federal Lead and Copper Rule compliance frameworks.
Purged Protocol (Microbiology, Nitrates, and Source Water Assessment)
Conversely, assessing biological pathogens, general potability, or private well aquifer integrity requires bypassing the indoor plumbing envelope entirely. Allowing stagnant water to enter these samples produces misleading results influenced by localized fixture colonization.
After sanitizing the fixture, open the cold water supply to a steady, non-turbulent stream. Allow the tap to run continuously for three to five minutes. For private groundwater wells, operate the spigot until the well pump cycles on and water temperature stabilizes, confirming that water held in pressure tanks and interior pipes has evacuated. Reduce the discharge velocity to approximately the diameter of a pencil lead before initiating bottle filling, ensuring laminar, splash-free flow.
Step 4: Executing Contamination-Free Bottle Filling
With the water stream stabilized, position your collection bottles on a clean surface. Maintain strict physical discipline throughout the collection process:
- Preserve Internal Sterility: When opening containers, break the tamper-evident seal and hold the cap facing downward. Never set the cap down on the sink basin or counter, and never allow your fingers to contact the inside threads of the cap or the container neck.
- Control Fill Levels: For microbiological bottles containing sodium thiosulfate, fill precisely to the molded fill line (typically 100 mL or 120 mL), leaving an air space above the liquid. This headspace enables the laboratory technician to shake and homogenize the sample prior to culturing. Do not allow the container to overflow, as this flushes out the chemical preservative.
- Zero-Headspace Technique for VOCs: Fill 40 mL VOC vials slowly to avoid turbulence until a positive convex meniscus rises slightly above the glass rim. Carefully position the PTFE-faced septum cap over the water dome and screw it down firmly. Invert the vial and tap gently against your palm; if any floating air bubbles appear, the volatile organics will partition into the air space, invalidating the test. The vial must be emptied and refilled using an unacidified backup container.
- Managing Chemical Preservatives: If collecting into bottles pre-dosed with nitric acid, sulfuric acid, or sodium hydroxide, never rinse the bottle before filling. Fill directly to the indicated level with zero splashing, as concentrated acid can generate chemical burns or dilute outside designated preservation ratios.
Reviewing our broader overview of common contaminants helps samplers anticipate which analytical preservative classes match their specific testing objectives, whether targeting volatile fuels, persistent agricultural nitrates, or dissolved metalloids.
Step 5: Completing Chain-of-Custody and Preservation Logistics
Physical collection constitutes only the first half of sampling integrity; preservation and document verification secure the remaining legal and analytical validity. Every certified laboratory provides a formal Chain of Custody (COC) form accompanying their kit.
Immediately after capping the vessels, transcribe the sample location identifier, exact date, time of day (using standard or military time), sample collector’s legal name, and specific analytical test codes onto the bottle labels using waterproof, indelible ink. Replicate this metadata onto the COC sheet. Any discrepancy between bottle labeling and COC documentation can trigger sample rejection upon laboratory intake.
| Analyte Target | Container Type | Preservation Method | Maximum Hold Time |
|---|---|---|---|
| Total Coliform / E. coli | Sterile plastic with Na2S2O3 | Chilled <10°C (Do not freeze) | 24–30 Hours |
| Lead and Copper | 1-Liter Wide-Mouth HDPE | Nitric Acid to pH <2.0 | 14 Days (prior to lab acidification) / 6 Months |
| Nitrate / Nitrite | HDPE or Polypropylene | Chilled ≤6°C | 48 Hours |
| Volatile Organics (VOCs) | 40 mL Amber Glass Septum Vials | Hydrochloric Acid + Chilled ≤6°C | 14 Days |
Thermal Preservation and Transit Limits
Most biological and inorganic analytes deteriorate rapidly under ambient environmental temperatures. Pack specimens immediately into an insulated shipping cooler lined with heavy-duty frozen gel packs or double-bagged wet ice to prevent leak contamination. Samples must reach thermal equilibrium between 2°C and 6°C during transit without freezing.
Hold times—the maximum duration between extraction and laboratory processing—are strictly enforced under EPA Ground Water and Drinking Water guidelines. Microbiological assays hold the tightest operational window: processing must begin within 24 to 30 hours of collection. Samples arriving beyond designated regulatory hold times will be officially flagged or discarded. Plan sampling schedules strategically, collecting specimens early on Monday through Wednesday mornings to avoid carrier shipping delays over weekends.
Special Environmental and Structural Considerations
Plumbing age, storage infrastructure, and secondary filtration require targeted sampling modifications. When auditing properties constructed prior to the late 1980s, galvanized iron risers, brass fixtures, and lead-soldered copper networks can create uneven contamination spikes across different floors. Methodical structural tracking methods, outlined within our report on water quality in older buildings, explain how sequential sampling—collecting multiple, successive 1-liter aliquots after stagnation—can identify whether heavy metals originate from individual faucets, branch piping, or main water service lines.
Similarly, for premises utilizing whole-house carbon filtration, reverse osmosis units, or water softeners, take split samples before and after the treatment apparatus. Testing raw influent alongside treated effluent verifies whether filter media remain functional, require backwashing, or have begun sloughing off accumulated microbial colonies into the distribution stream.
Interpreting Lab Feedback and Next Steps
Once the analytical facility completes processing, clients receive an official Certificate of Analysis comparing detected parameters against Maximum Contaminant Levels (MCLs) or Secondary Maximum Contaminant Levels (SMCLs). If an analyte exceeds public safety guidelines, avoid panic. Cross-verify the sampling conditions noted on your COC to confirm no physical errors occurred during collection.
Where health concerns arise from persistent water quality anomalies, individuals should consult primary healthcare professionals or certified environmental health practitioners rather than relying on unverified internet treatment claims. If initial testing confirms true aquifer or structural contamination, certified water treatment specialists can install calibrated remediation systems, such as catalytic carbon, aeration towers, or point-of-entry reverse osmosis, returning the building’s supply to regulatory purity.
Rigorous water testing is a continuous discipline rather than a single event. Private well owners and facility engineers should establish recurring annual sampling regimens for coliforms and nitrates, alongside multi-year screening for heavy metals. For ongoing updates on testing regulations, municipal reporting analysis, and emerging environmental concerns, explore the Water Quality Journal as your primary resource for scientific water stewardship.